Creating a personalized browband for a horse can be a fulfilling and creative project for any horse enthusiast. Not only does it allow you to add a personal touch to your horse’s gear, but it also ensures the perfect fit and design that you desire. This comprehensive guide explores every detail you need to know about how to make a browband for a horse, ensuring that you do so with ease and enjoyment.

Understanding the Importance of a Browband
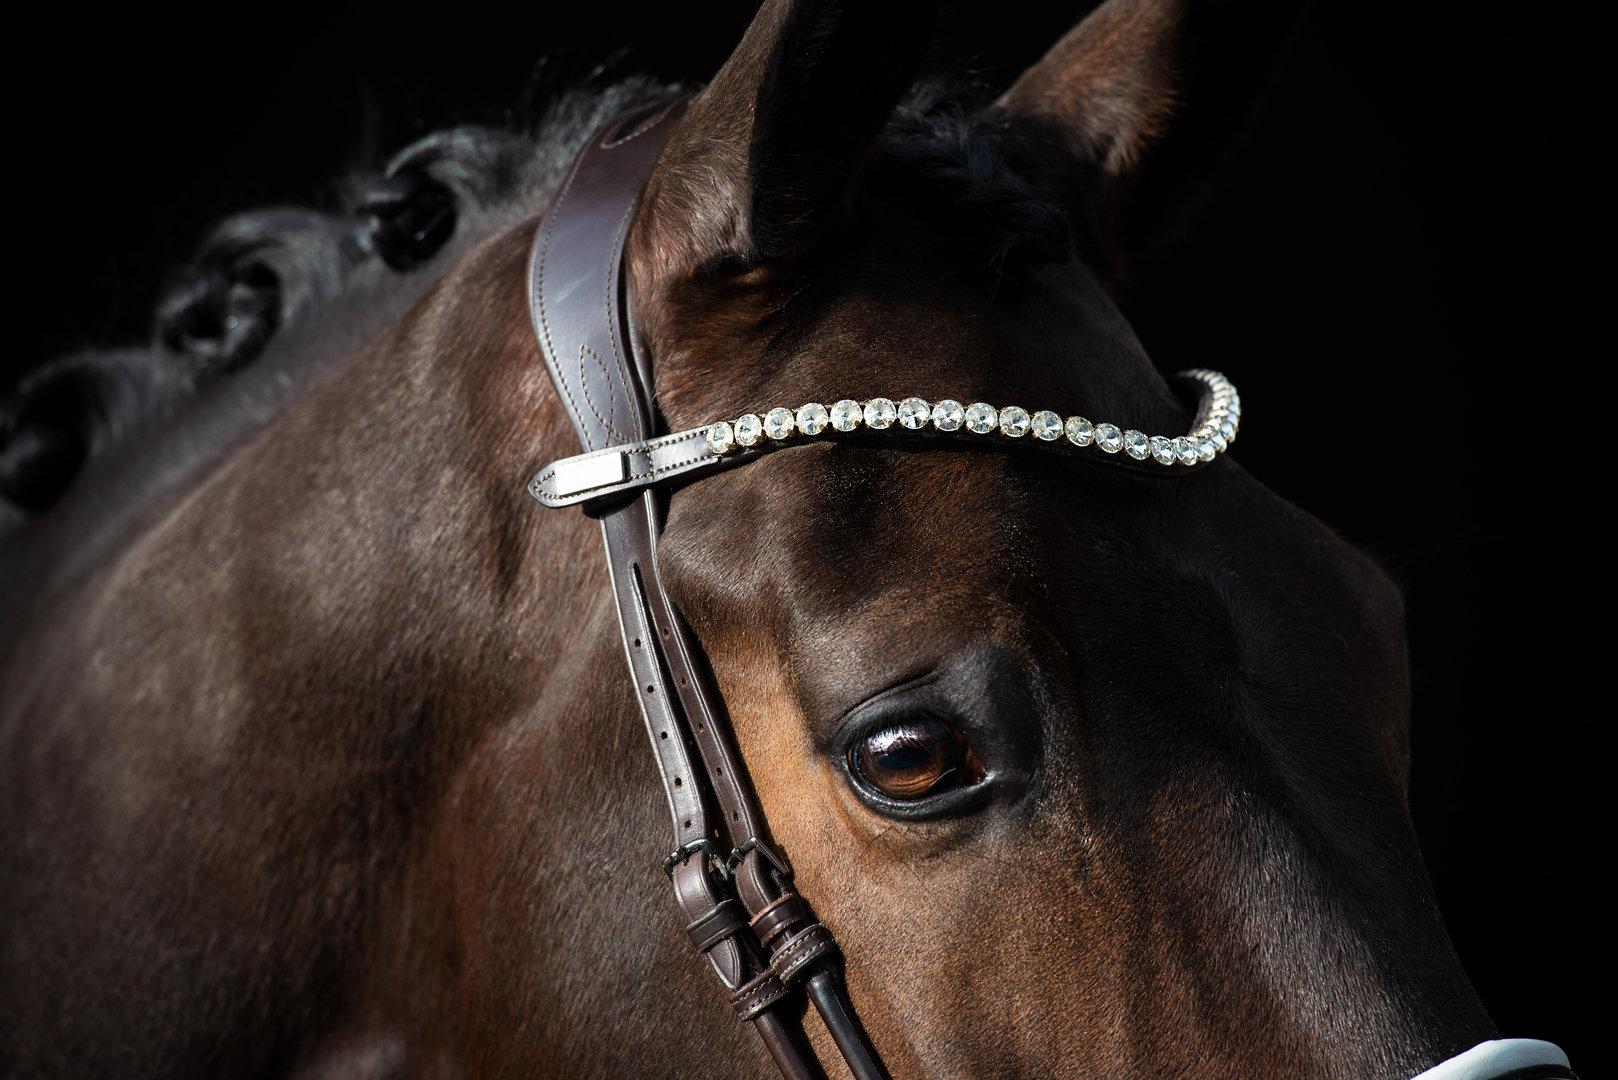
Before diving into the actual making process, it’s essential to understand what a browband is and why it matters. The browband is part of a horse’s bridle, running across the forehead, and is essential for keeping the bridle in place. It contributes both to the horse’s comfort and the overall aesthetics of the bridle. A well-crafted browband can make your horse look elegant and well-kept.
Materials Needed for Making a Browband
Selecting Quality Leather
The choice of leather is crucial because it impacts both the durability and look of the browband. Choose a high-quality leather that complements your horse’s coat and is robust enough to withstand daily wear.
Decorative Elements
Add personal flair to the browband with elements like beads, crystals, or studs. Choose elements that not only reflect your style but are safe and comfortable for your horse.
Essential Tools
Ensure you have all necessary tools beforehand, such as a cutting knife, leather punch, stitching kit, and measurement tape. Proper tools streamline the creation process significantly.
Steps to Create Your Horse Browband
Step 1: Measurement
Accurate measurement is crucial. Use a tape measure to determine your horses brow width. Add an extra inch to both ends to secure the browband’s ends properly.
Step 2: Cutting the Leather
Using the measurements obtained, cut the leather piece accordingly. Ensure the cut is clean and exact to maintain a professional finish.
Step 3: Punching Holes
With the leather punch, create the necessary holes at each end of the leather. These holes will be used to secure the browband to the bridle.
Step 4: Adding Decorative Elements
Using your chosen decorative elements, embellish the browband as you see fit. Ensure that the attachments are secure and won’t cause discomfort.
Step 5: Stitching
With your stitching kit, meticulously stitch the ends of the browband. This adds durability and ensures the elements are well-secured.
Caring for Your Custom Browband
Proper maintenance is key to prolonging the life of the browband. Regularly clean with a suitable leather cleaner to keep it looking new and to prevent wear and tear.
Common Mistakes to Avoid
Avoid cutting corners with cheap materials, as this can compromise both the durability and aesthetics of the browband.
Exploring Other Horse Accessories
If you’re interested in creating additional horse accessories, consider checking out some essential riding gear items that every equestrian should have.
FAQ Section
What is the primary function of a browband?
The browband helps keep the bridle in place while adding aesthetic value to a horses gear.
Can I use any type of leather?
Its advisable to use high-quality leather with a thickness suitable for your horses needs.
How often should I clean my browband?
Regular cleaning is recommended, at least once a month, to maintain its quality and appearance.
Making a browband for a horse is a delightful project that allows you to express your creativity while crafting something truly useful and tailor-made for your equine friend. For additional information on caring for horse gear, you might want to visit this guide on maintaining and storing riding gear. Whether you are a seasoned DIY enthusiast or new to crafting, creating a browband is a project worth trying.